How to Migrate PHP Apps
DataShuttle makes it very easy to move a WordPress app from one server to another. You’ll need the following information to migrate your app:
- Source server’s IP address (where the app currently resides)
- SSH username and password (server must have password auth enabled; SSH must be running on port 22; SSH user should be the owner of the app)
- Source database name, username and password (these are not the same as the SSH username and password)
- Directory where the app currently resides
- Destination server’s IP address
- ServerPilot system user and password on destination server
- Destination directory (where in the filesystem we’ll be migrating the app)
- Destination database name, username, and password (these are not the same as the ServerPilot system user and password)
For more information, see server requirements.
apps/APPNAME/public, and the absolute path is
/srv/users/SYSUSER/apps/APPNAME/public, where APPNAME is the name of your app and SYSUSER is the
respective system user associated with the app.
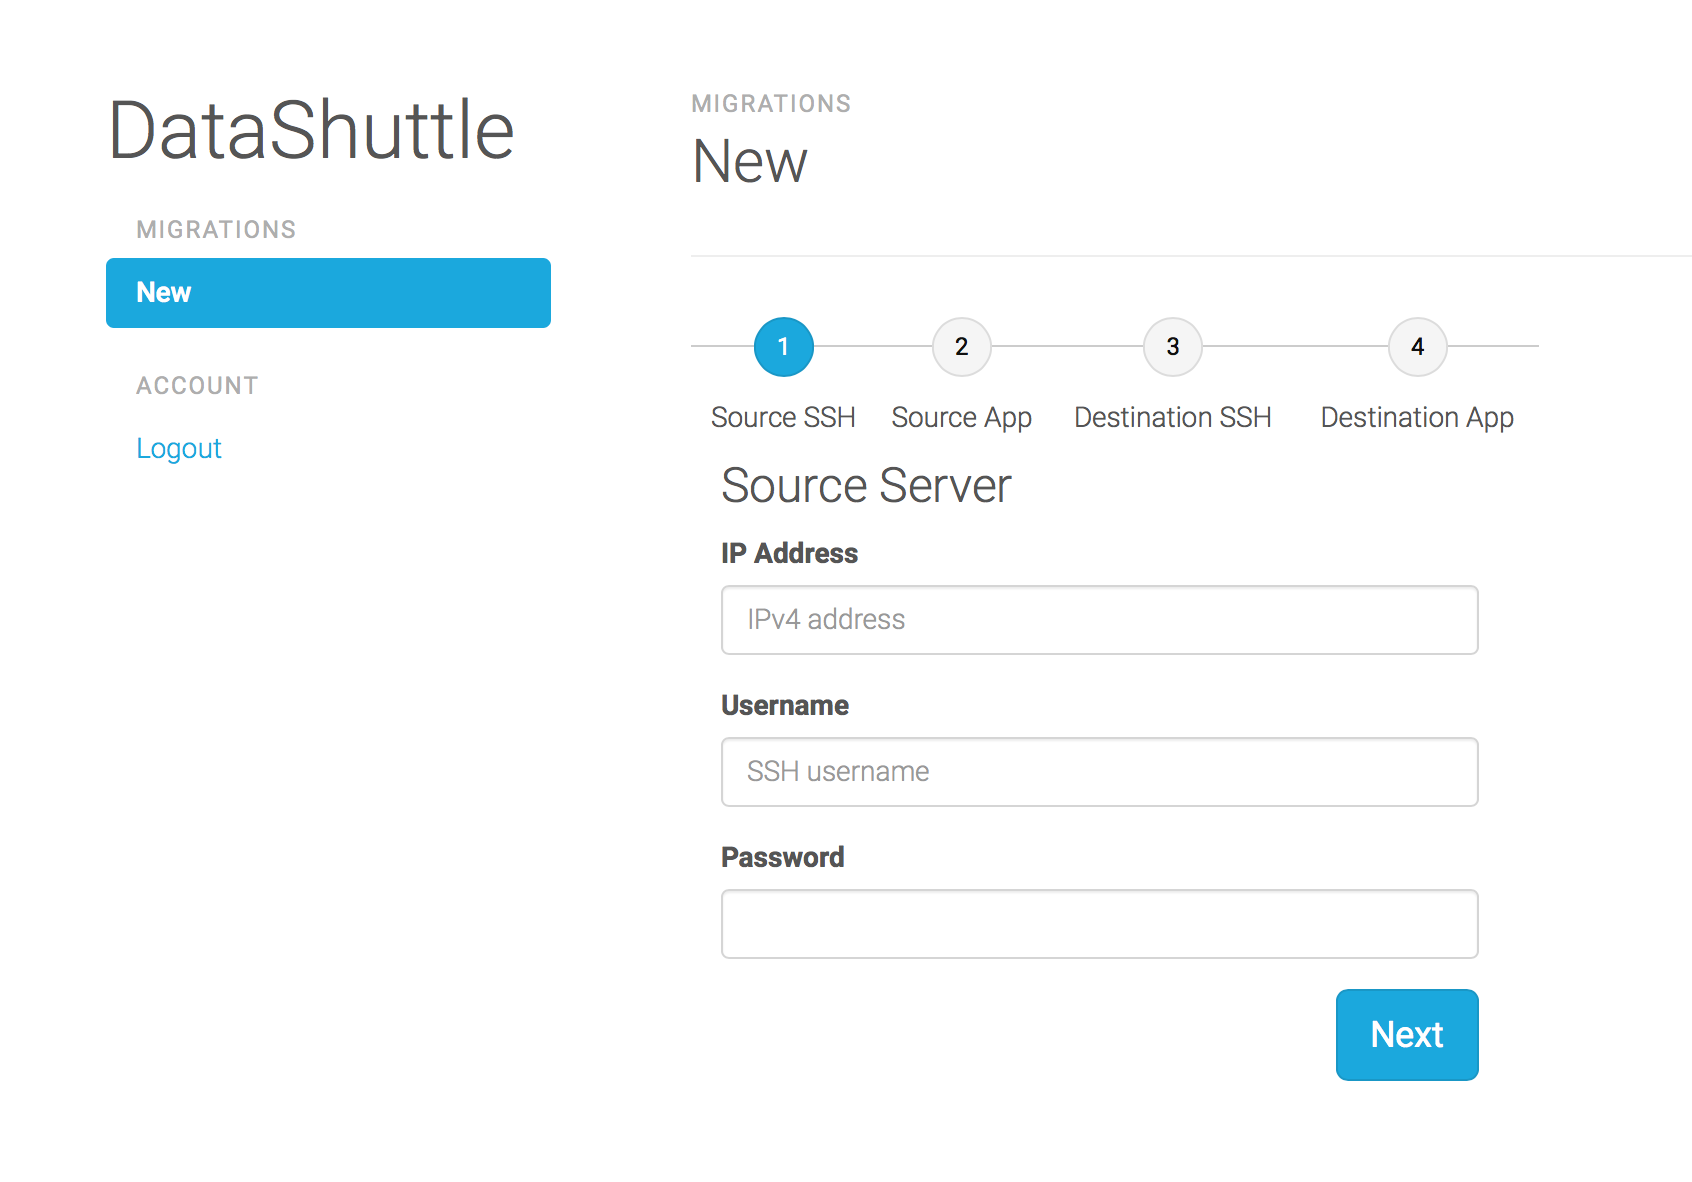
Step One: Enter Source Server Information
To connect to the source server, enter the server’s IP address, SSH username and password. Then click Next.
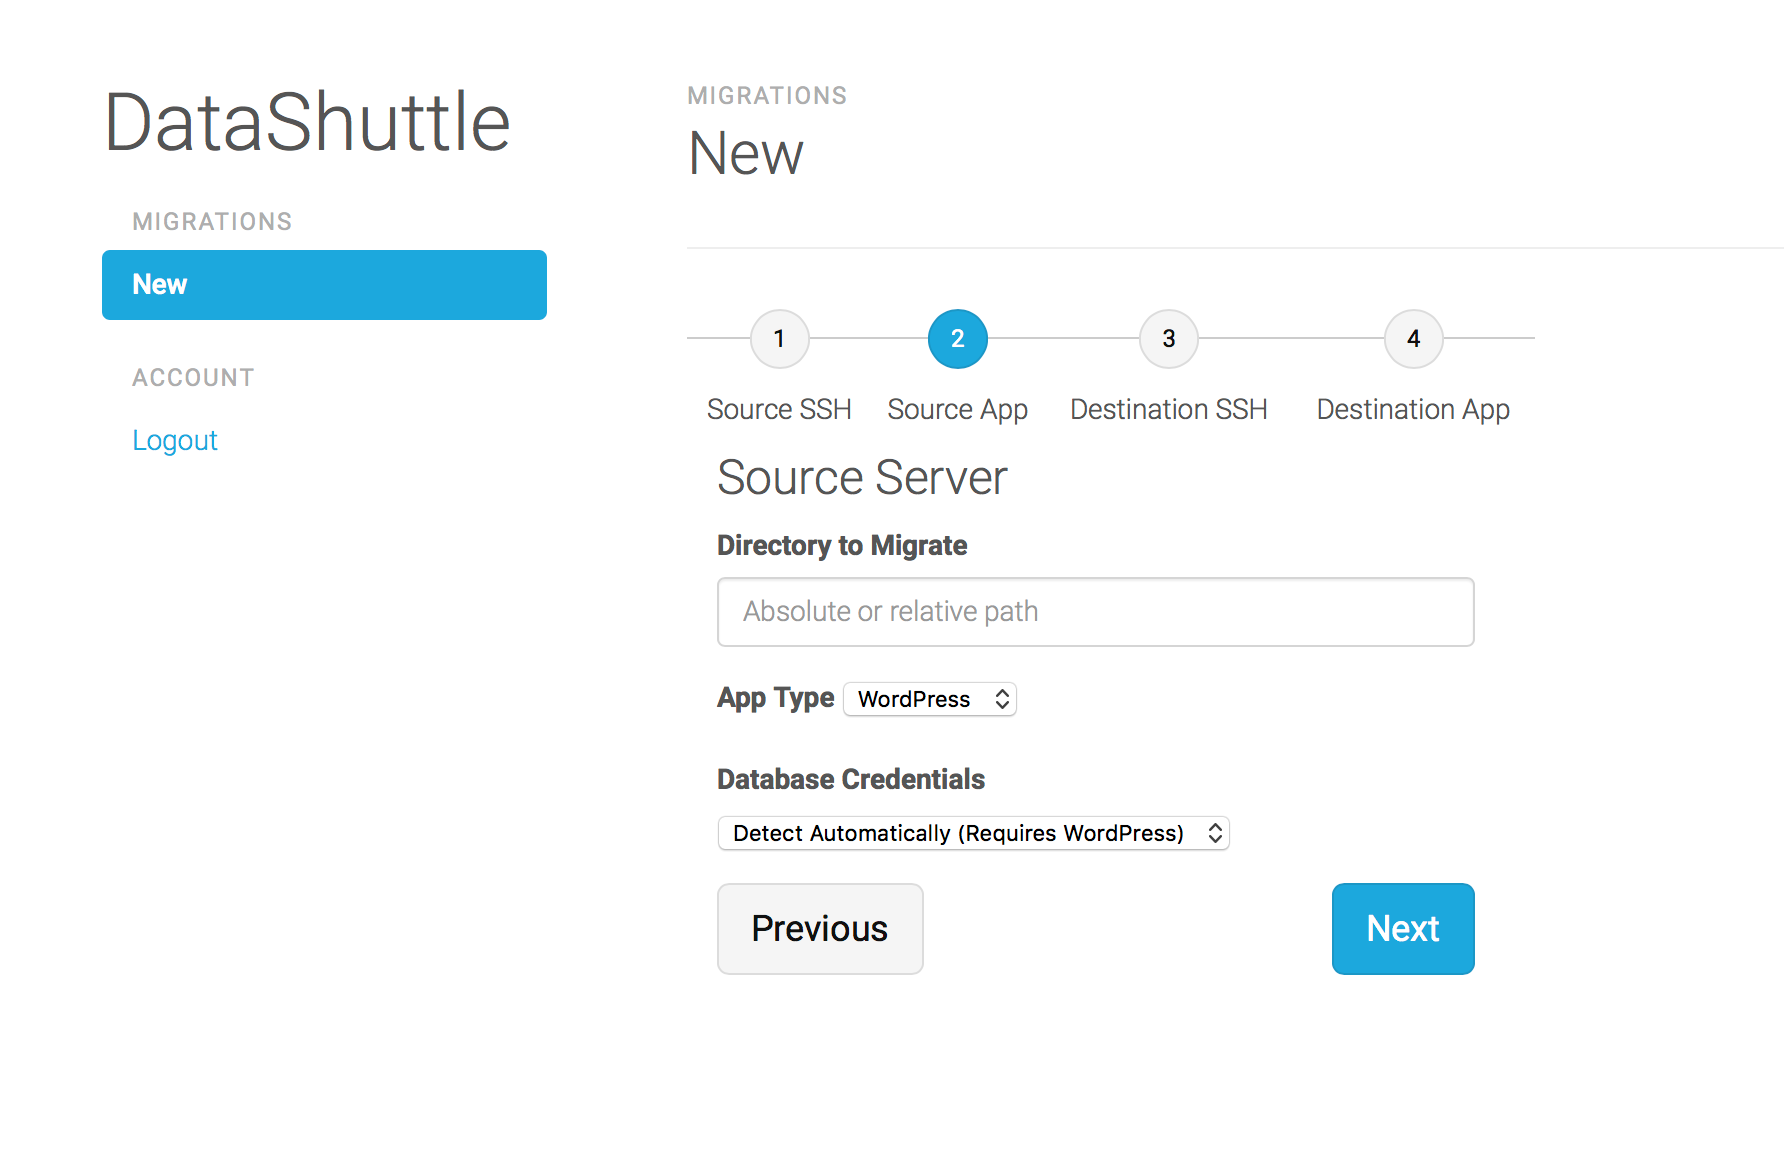
Step Two: Enter Source App Information
Next, you’ll need to enter information about your app. Enter the directory (relative or absolute path) you want to migrate, select “Other” for App Type, and “Manual” for Database Credentials (if you’re not migrating a database, select “Don’t Migrate Database”). Then, click Next.
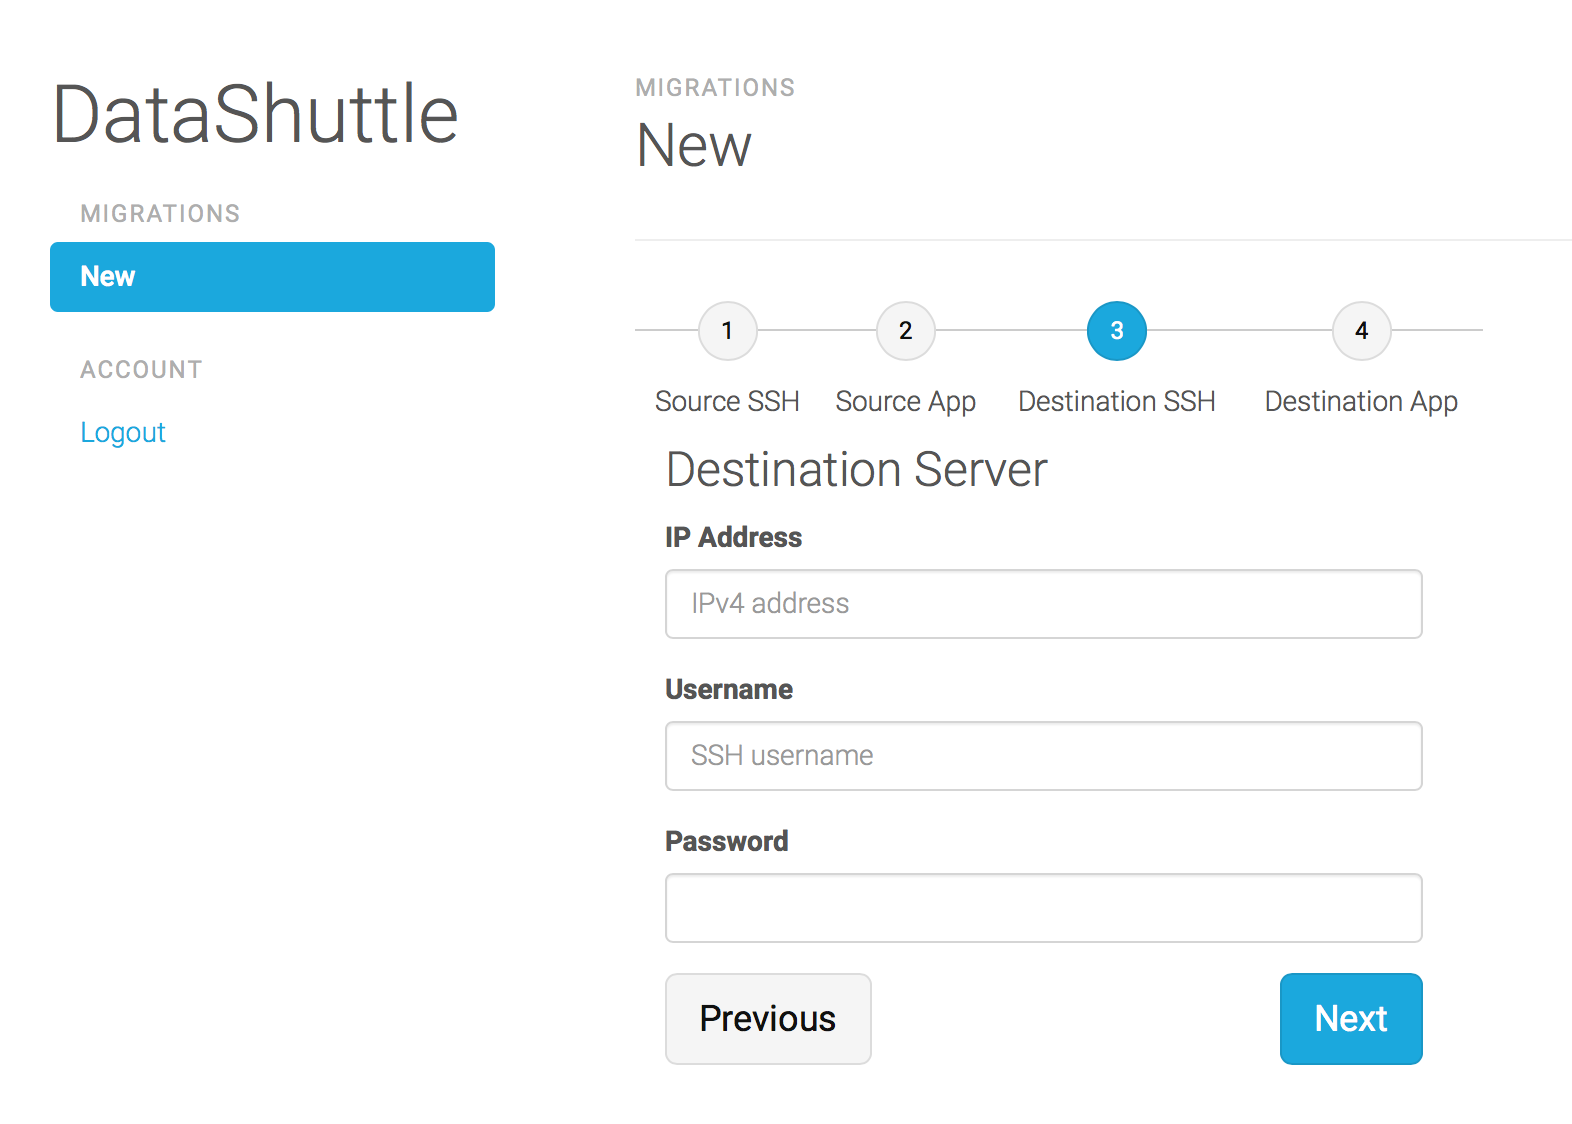
Step Three: Enter Destination Server Information
The destination server is where you want to migrate your app. Enter the server’s IP address, ServerPilot system user and password. Click Next.
Step Four: Enter Destination App Information
Finally, you need to enter details about the destination of the app. Enter the directory (relative or absolute path) where you wish to migrate the app, the database name, username and password (these are different than the ServerPilot system user’s credentials). Click Migrate.
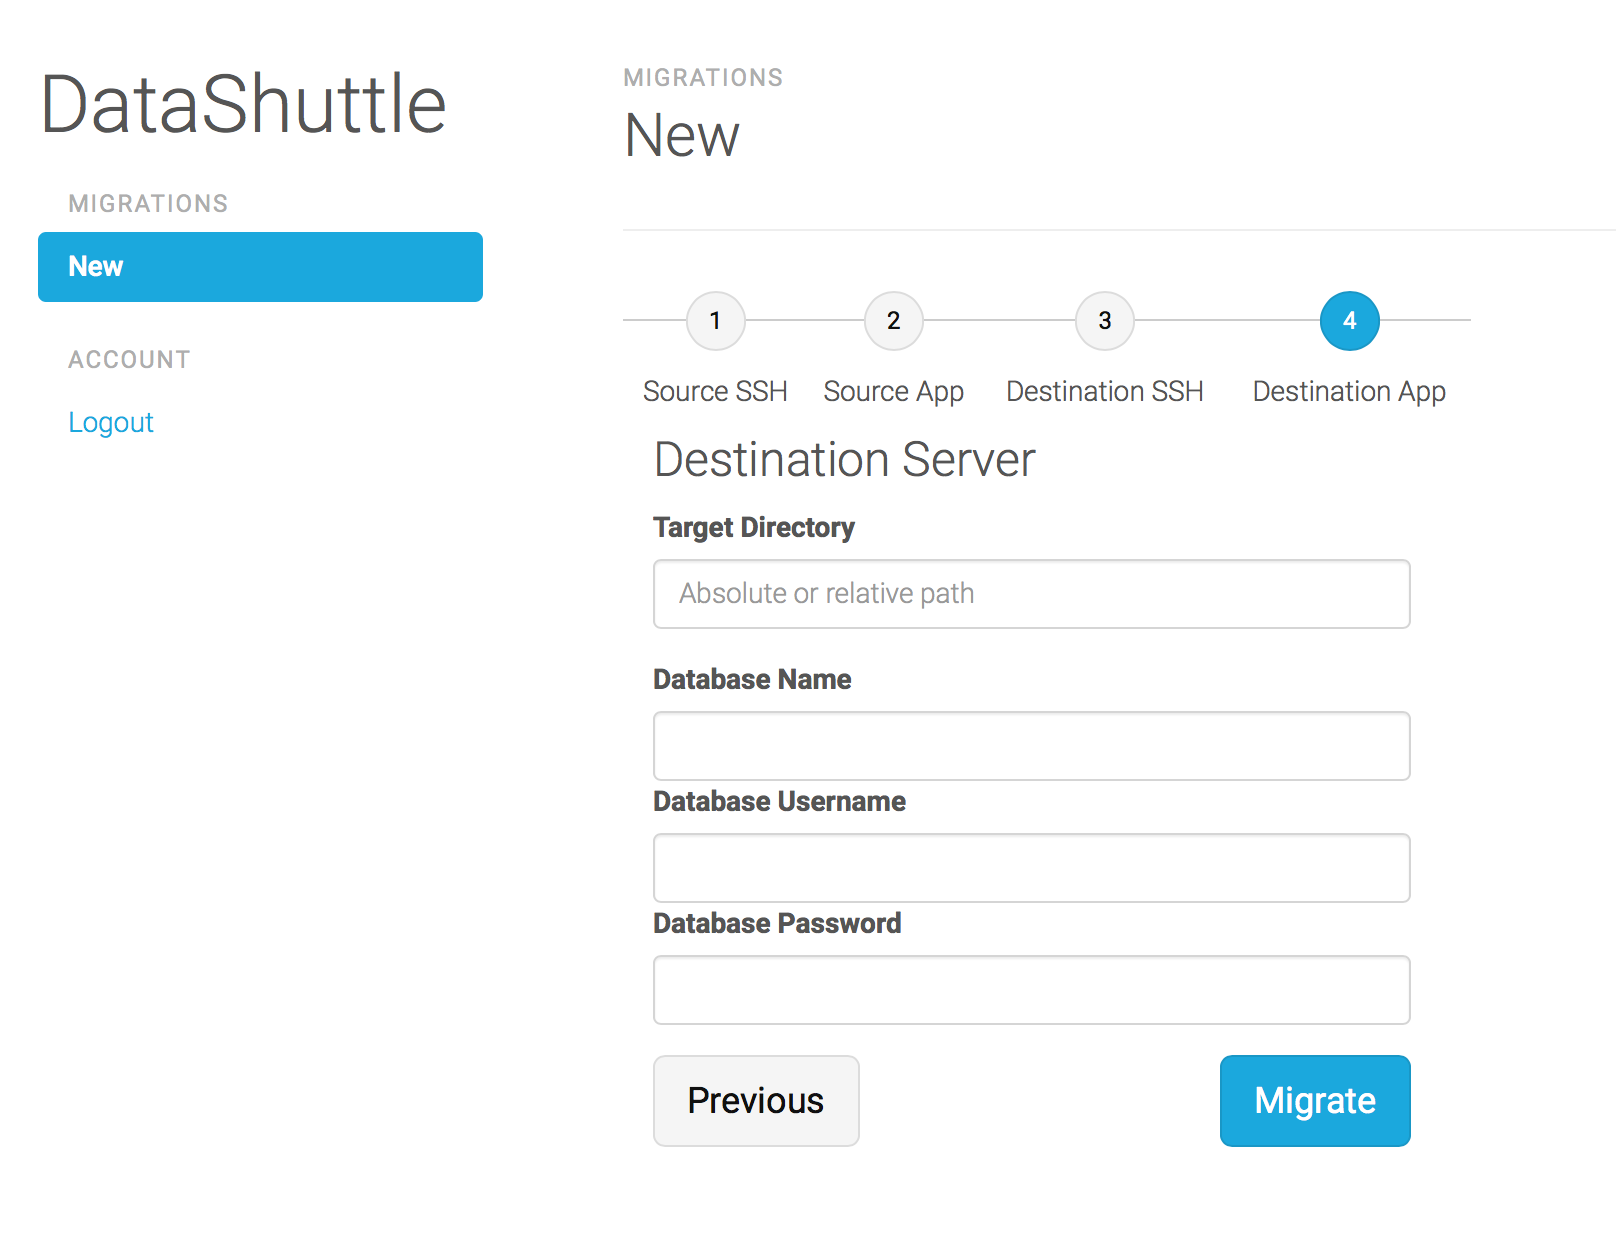
If all of the checks have passed, then your app will be migrated! The status of the app will be displayed, and you can see when it’s finished.
If you run into any issues or have any questions, please contact us.